It’s getting hot in here: Shading Options for Tiny Homes
Hi everyone,
as you all know, we’re not just building and selling tiny homes, we also live in one.
In the world of tiny living, space efficiency and sustainability take center stage. But as any tiny homeowner knows, creating a livable outdoor area can significantly enhance the experience of tiny living. One essential element of a functional outdoor space is shading. Whether it's a deck, patio, or garden, thoughtful shading not only protects you from the elements but also enhances the usability of your outdoor area.
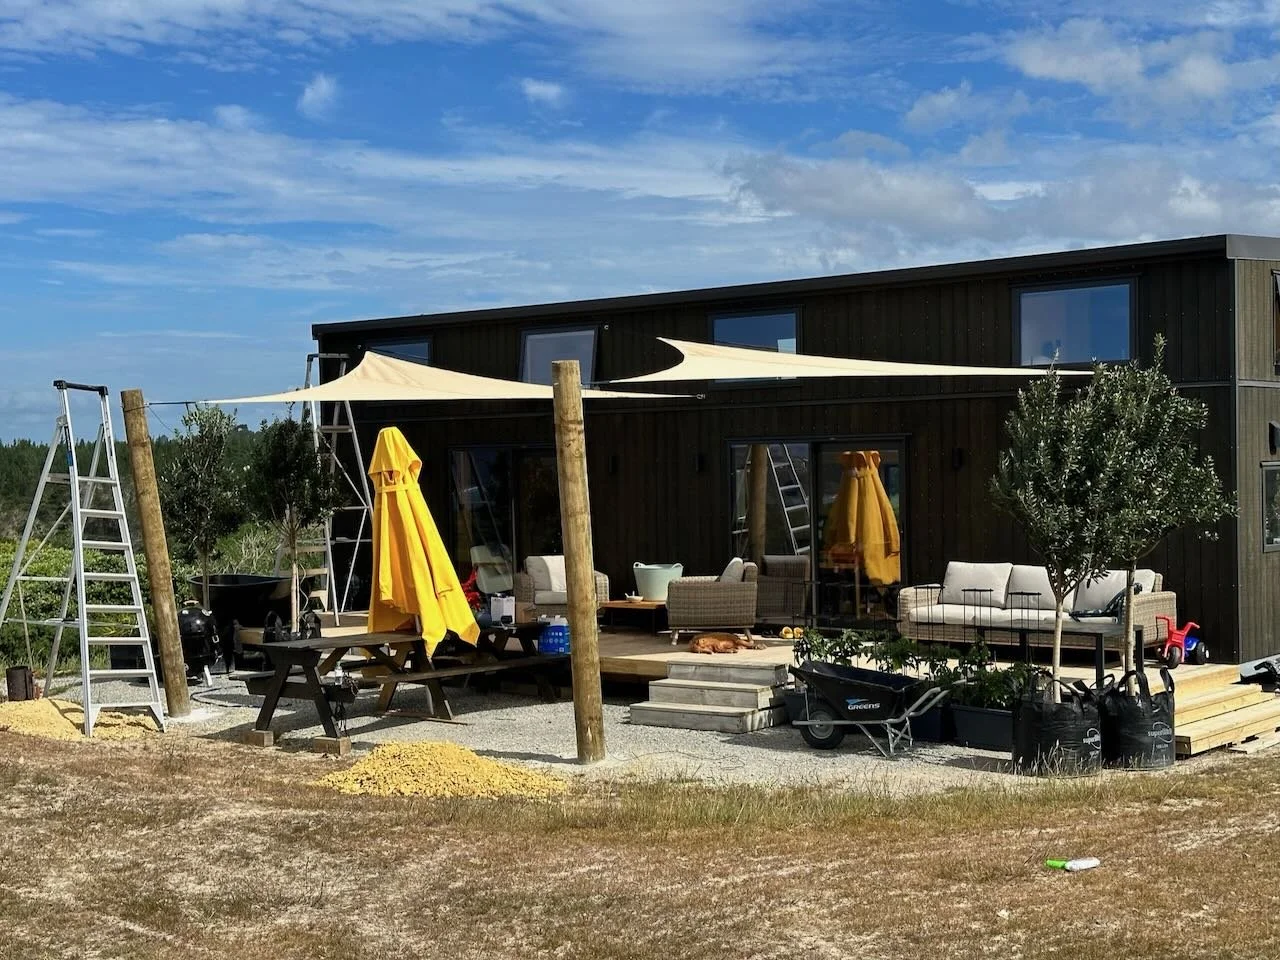
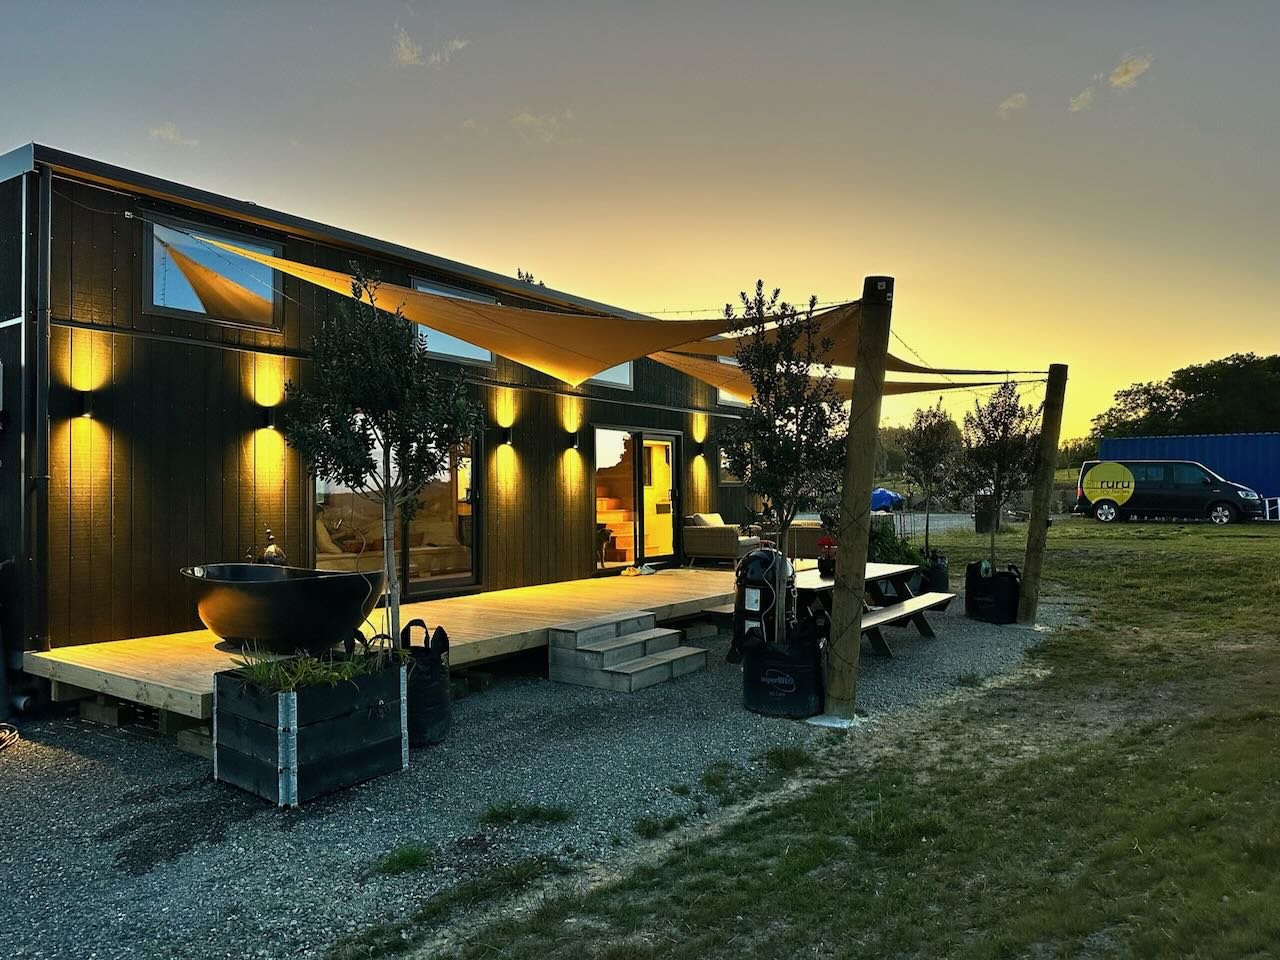
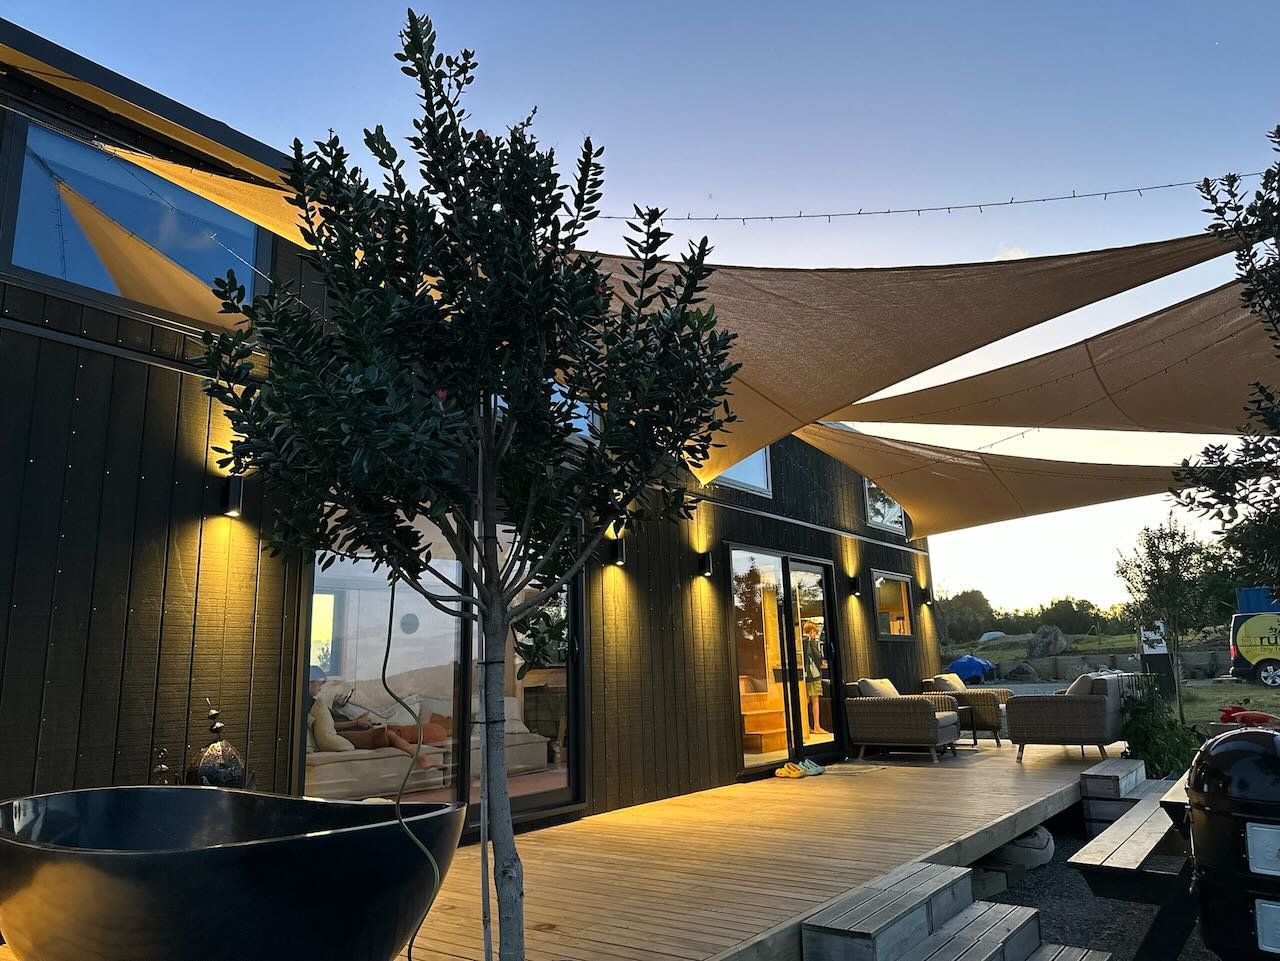
Today, we're sharing our journey of installing a sun sail cover over our relocateable deck, a project inspired by the need for practical, sustainable solutions for tiny homes like ours. Our setup involves two large posts, a series of triangular sun sails, and some heavy-duty gear—all coming together to provide the perfect shade.
Why Shading Matters for Tiny Homes
Tiny homes often come with outdoor areas that double as extensions of the indoor living space. Shading these spaces has numerous benefits:
Comfort: Protects against harsh sunlight, keeping outdoor areas cool and usable even during peak summer.
Energy Efficiency: Reduces heat transfer into the home, easing the load on cooling systems.
Durability: Shields furniture and decking materials from UV damage.
Aesthetics: Adds visual appeal and design character to your outdoor setup.
For tiny homeowners like us, portability and practicality are key. That’s why we opted for a sun sail system, a versatile and visually appealing solution.
The Huelsmeyers’ Sun Sail Adventure
At Ruru Tiny Homes, we pride ourselves on blending functionality and beauty in small spaces. Our latest project—installing a sun sail cover over our moveable deck—was both a design challenge and an exciting family endeavor. Here’s how we made it happen, step by step.
Step 1: Planning the Project
The first step was to assess the space and decide on the type of shade we wanted. We chose three triangular sun sails, which we planned to anchor to two tall posts set into the ground and to the house itself. This configuration would allow us to adjust the sails for optimal shading throughout the day.
Key considerations during planning:
Orientation: Position the sails to block midday sun while allowing morning and evening light.
Material: Use UV-resistant fabric designed for outdoor use.
Tension Points: Ensure the design can withstand wind stresses.
We decided on 4-meter-long posts, sinking 1 meter of each post into the ground for stability, leaving 3 meters above ground to support the sails. The posts would be angled slightly away from the house to counteract the tension created by the tightly stretched sails.
Step 2: Gathering the Right Gear
For a project like this, preparation is everything. We gathered the following tools and materials:
Posts: Two treated wooden posts, 4 meters long. Round posts are stronger, we went with 200mm thickness.
Concrete: Quick-set concrete mix for anchoring the posts. If you think you have enough bags, add about 5 more to your trolley. Trust us.
Sun Sails: Three high-quality, triangular sun sails with UV protection. You really don’t want to save here.
Hardware: Turnbuckles, D-rings, and tensioning cables.
Digger: A small digger to dig 1-meter-deep post holes. A capable digger driver not ruining the rest of the property.
Measuring Tools: Spirit level, measuring tape, and a post angle guide. Spray Paint.
Extras: Common Sense, and muscles. And a sun hat.
Step 3: Installing the Posts
With everything ready, we got to work. Here’s how we installed the posts:
Digging the Holes:
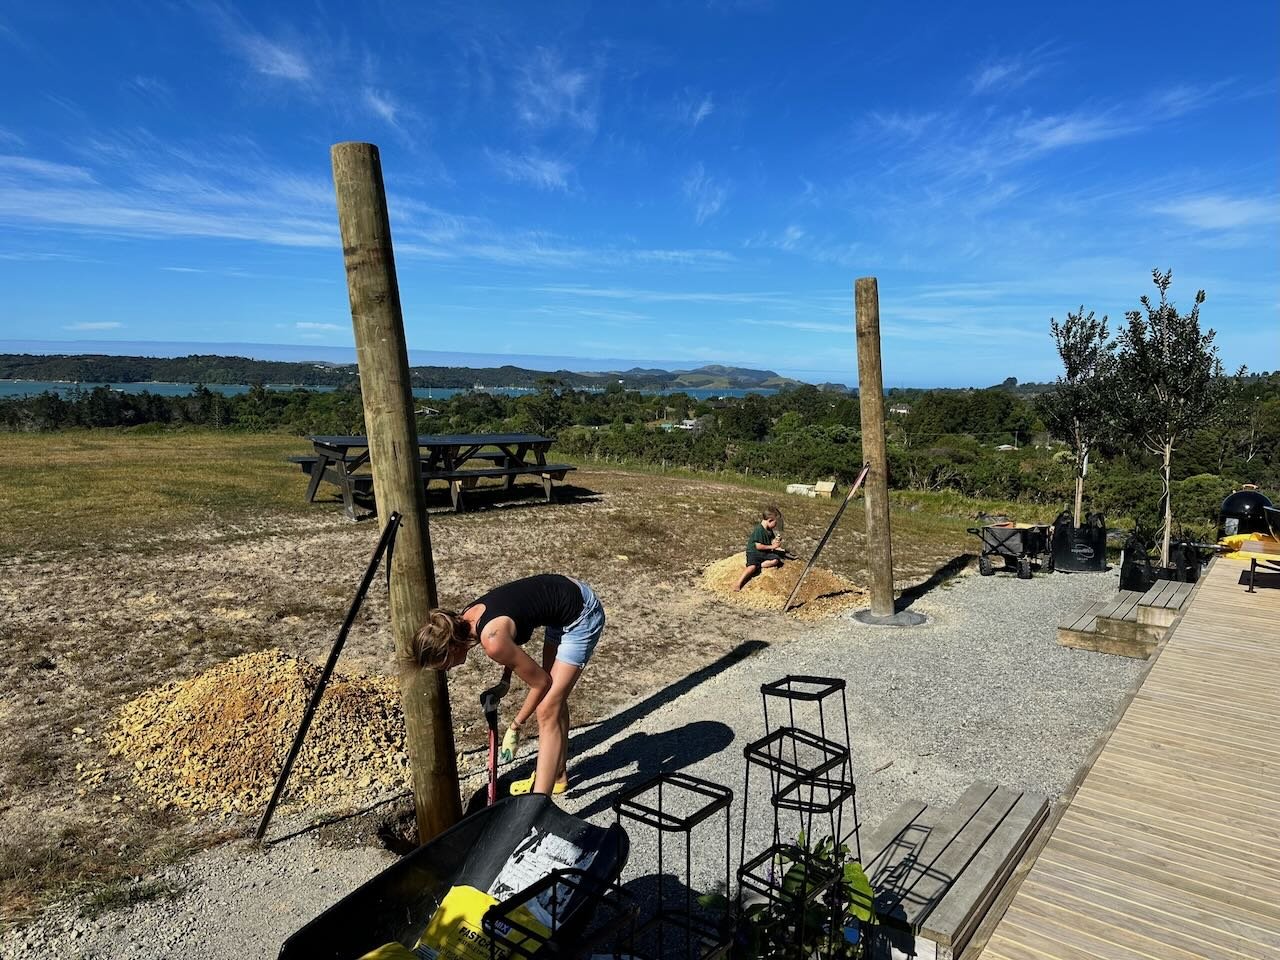
Using a small digger, we dug two holes 1 meter deep with an auger attachment. It’s essential to ensure the depth is consistent for even support. With our ground being clay and previously having been compacted this was the only way. The shevel bent by even thinking about doing it by hand.Setting the Angle:
Before placing the posts in the holes, we angled them slightly away from the house as per the sun sails instructions. This prevents the posts from leaning toward the house under the tension of the sun sails.Securing the Posts:
Once the posts were positioned, we mixed quick-set concrete in the filled the holes around the posts. We used a spirit level to double-check the angle before the concrete set.Allowing to Cure:
Concrete curing is crucial for stability. We left the posts untouched for 48 hours to ensure a strong bond. I had to keep myself from trying to put up a hammock several times. I managed!
Step 4: Installing the Sun Sails
With the posts in place, it was time to attach the sun sails. Here’s how we did it:
Attaching the Hardware:
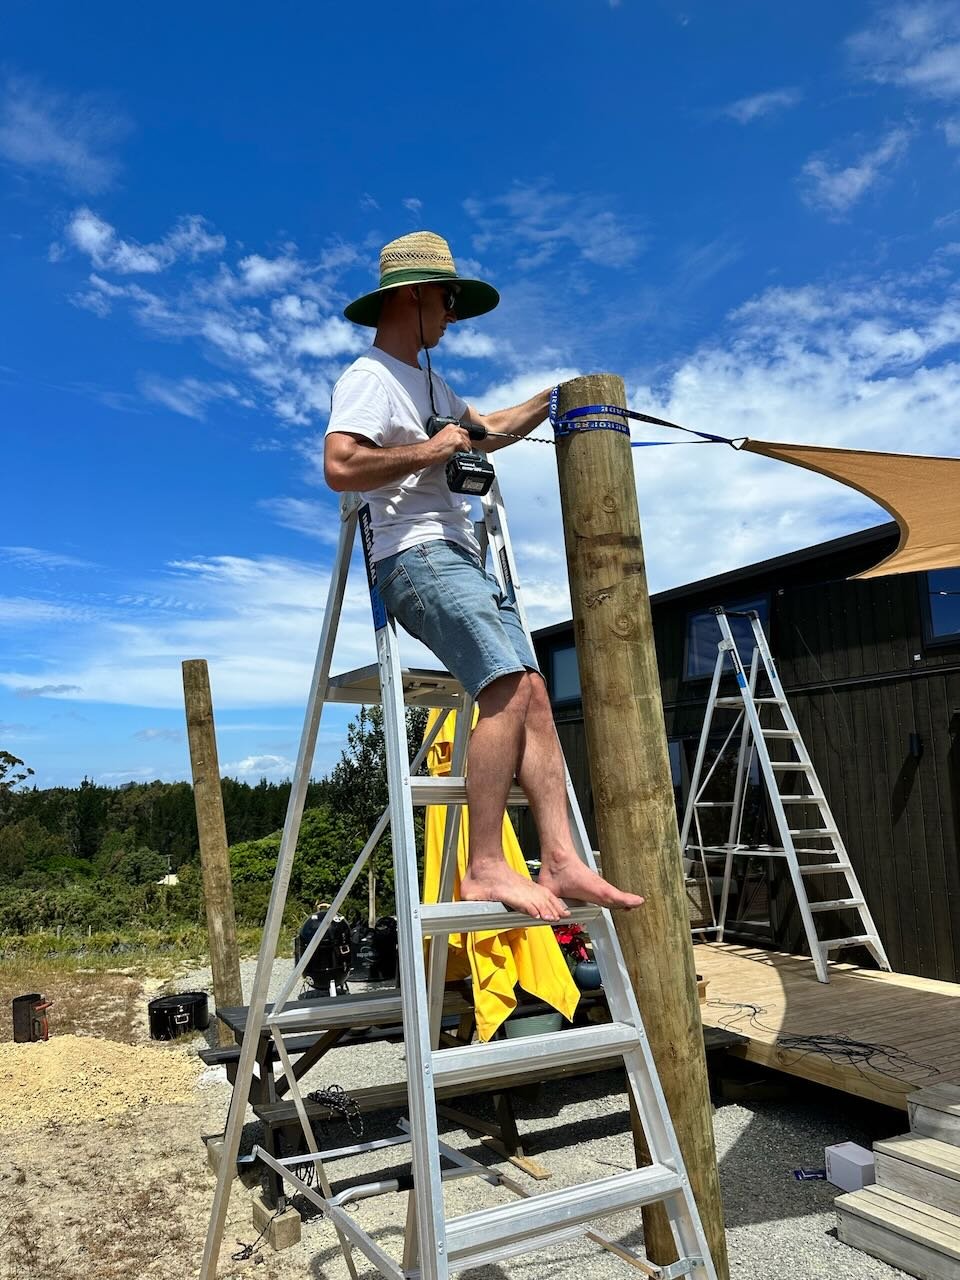
We fixed sturdy D-rings to the tops of the posts and to the side of the house. Each ring was installed using stainless steel screws and washers for durability.Positioning the Sails:
We laid out the sun sails and connected their corners to the D-rings using turnbuckles. The turnbuckles allow for precise tension adjustments.Tensioning the Sails:
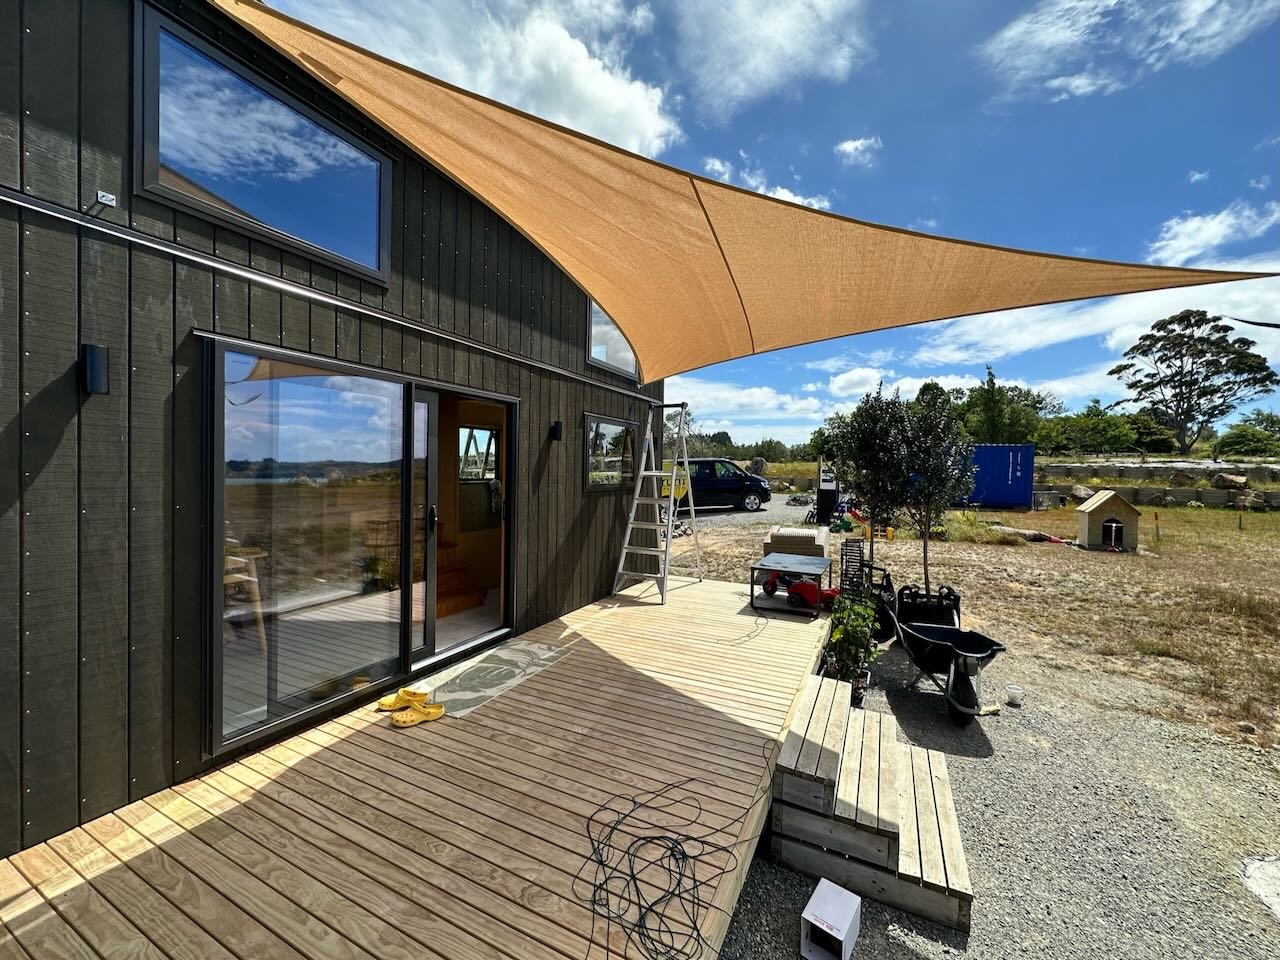
Using the turnbuckles, we gradually tightened the sails until they were taut. It’s important to avoid over-tensioning, as this can damage the fabric or hardware.Checking for Sagging:
We checked for sagging in the fabric. A properly installed sun sail should have a slight curve (known as catenary tension) to maintain stability and aesthetics.
Tips for Installing Sun Sails on Tiny Homes
Use Quality Materials: Invest in UV-resistant fabrics and stainless-steel hardware for long-lasting performance.
Ensure Proper Tension: A well-tensioned sail resists wind damage and maintains its shape over time.
Account for Wind: Angle posts and use secure anchors to handle the tension created by wind gusts.
Think About Drainage: Install sails with a slight slope to prevent water pooling during rain.
Consider Adjustability: Use turnbuckles or adjustable hardware for seasonal changes or specific shading needs.
Lessons Learned
Installing a sun sail was a rewarding experience, but it came with its share of challenges. Here’s what we learned:
Do it before it’s hot: It was a terrible experience to carry out this work during school hours while the kids were away, in already 25 degrees of burning sun. You really want to plan ahead and get onto it BEFORE summer hits.
Plan for Wind: The tension created by wind is no joke. Anchoring posts securely and using durable hardware made a huge difference.
Measure Twice: Getting the angles right on the posts was tricky but essential for long-term stability.
Take Your Time: Allowing the concrete to fully cure and taking time to tension the sails properly ensured a professional finish. Don’t (I repeat) DO NOT try to put up a hammock before fully set.
Why Sun Sails Are Perfect for Tiny Homes
Sun sails are a fantastic shading option for tiny homes, offering a blend of functionality, portability, and style. Here’s why they work so well:
Adaptable: Sails can be adjusted or removed as needed, making them ideal for moveable or temporary outdoor spaces.
Space-Saving: Unlike traditional pergolas or awnings, sails don’t take up valuable ground space.
Eco-Friendly: By reducing heat gain, sun sails can lower your cooling needs, making them an environmentally conscious choice.
Final Thoughts
For Daniel and me, this project was more than just a shading solution—it was an opportunity to enhance our outdoor living space while staying true to our tiny living philosophy. The result? A stylish, functional deck that’s perfect for family gatherings, lazy afternoons, and even New Zealand’s occasional summer rain.
If you’re considering shading options for your tiny home, and you don’t want to go the full mile of an outdoor sun room with a porched roof - we highly recommend sun sails. With the right planning, materials, and installation techniques, they can transform your outdoor space into a comfortable and inviting extension of your home.
Have you installed sun sails, shade solutions or other creative ideas on your tiny home or outdoor space? Share your experiences and tips in the comments below—we’d love to hear your story!


